

Hello Everyone! Hope we are all well. Today I thought I would bring to you my gingerbread wreath recipe, as so many of you showed interest towards it over on the gram. One thing I must point out is, I really don’t like how I did the bow. I don’t know, I just wish I did a spare one, as this was the first gingerbread I decided to decorate, so it turned out pretty bad. So let’s ignore the bow, but I suppose it just shows that not everything turns out perfect. Its also part of learning, and you know what to do differently next time. This is why I decided to keep it in the picture. This would make such a good centerpiece for your Christmas table, and I’ve just just had a thought, that it would look lovely on one of those wooden slate blocks.

The reason why I like this recipe, is because I’m a bit fussy with my gingerbread. You can go to supermarkets and well known bakeries, and I just feel like the gingerbread is too hard. I like my gingerbread a bit softer, where its not going to break your teeth when you bite into it. You could also wrap a biscuit up in little cellophane bags, and tie them to the front of presents, which would be a lovely handmade touch. The possibilities are endless. If you have people who don’t like ginger, leave out the ginger and cinnamon, or you could bake a gingerbread one, and a plain one! They are super easy to make, I’ve never had any problems with the recipe, and the best thing about them is they don’t lose their shape when going in the oven.
This is also a good recipe for little ones to enjoy. Why not leave one next to Santa’s mince pie Christmas Eve? Anyone can have fun making them though, friends, adults, flatmates. You could even do this as a group activity, get different decorations, and see who can create the best wreath. Whatever you choose, they will definitely go down a treat.

Eek!! Typing this has just hit me that Christmas is only around the corner. I love baking all year round, but Christmas time is my favourite. Ginger is a real festive smell, and making these, left my house smelling so nice and festive. I made these listening to and singing away to Christmas music in the background. Last year, I actually made up little hampers of homemade goods, and give them out to people, it was so much fun. If there are any recipes you are wanting to see on my blog, feel free to comment below.

Gingerbread Wreath!
Equipment
- Bow and holly cookie cutters
Ingredients For The Gingerbread
- 350g plain flour
- 2 tsp ground ginger
- 1 tsp bicarbonate of soda
- 1 tsp ground cinnamon
- 125g butter
- 175g light brown sugar
- 1 free range egg
- 4 tbsp golden syrup
Ingredients For Decorating The Gingerbread
- 400g icing sugar
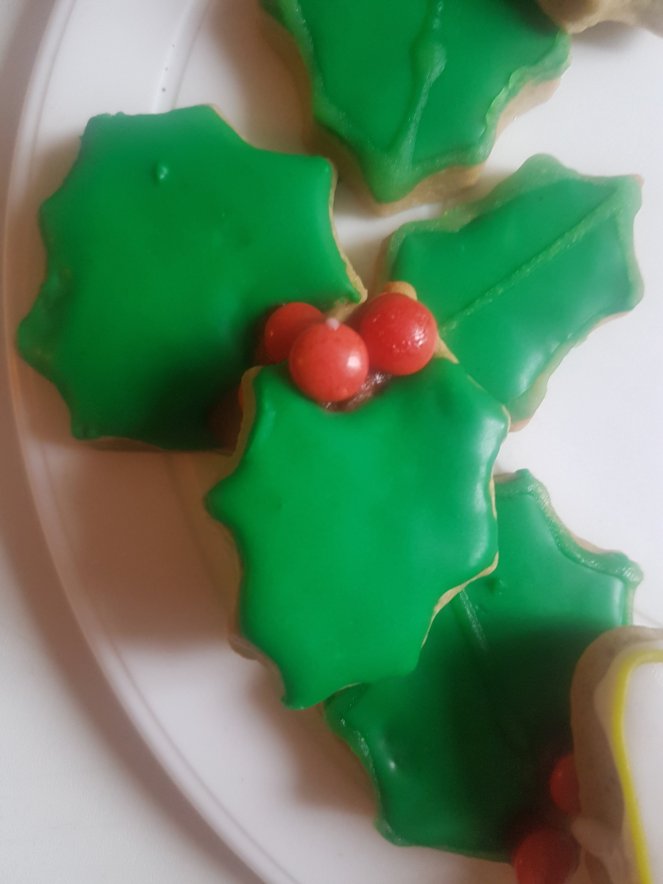
- Red circle chocolate sweets
Method
- Sift the flour into a mixing bowl or food processor. Add the bicarbonate of soda, cinnamon and ginger to the flour, and mix together.
- Add the butter and either blend or rub it in with your hands, until the mixture looks like breadcrumbs. Mix in the sugar.
- In a separate bowl, beat the egg and golden syrup together. Then add it to the bowl or food processor. Once the mixture has clumped together, knead until smooth and wrap it up in clingfilm. Leave to chill in the fridge for 15 minutes.
- Preheat your oven to 180/Gas 4. Like 2 baking trays with grease-proof paper.
- Roll the dough out onto a lightly floured surfaced, to about 5mm thick.
- Cut out 1 bow and then as many holly shapes as you can out of the mixture. The more you cut out, the fuller the wreath.
- Place them on the prepared trays and bake for 10-15 minutes. Then remove and place on a cooling rack.
Note: I didn’t use a food processor for this method, but either way works really well.
Decorating
- Once cool, make your icing by sifting the icing sugar in a bowl, adding water to it a teaspoon at a time, till you get a smooth consistency but not runny.
- Keep a little bit of icing back for the bow, and add green food colouring to the rest of the icing.
- Fit 2 piping bags with 2 thin round nozzles. Flood ice the gingerbread.
- For the berries, add your chocolate sweets to the holly leaves, (I used a little icing to stick these on) and decorate the bow however you’d like too.
- Once the icing has dried, arrange your bow and holly onto a pretty serving board and enjoy all your hard work!
Notes: These biscuits will last a week kept in an air tight container. Let’s face it though, they aren’t going to last a week!
I hope you enjoy this recipe!
A x

Ummm…YES!!!!
LikeLiked by 1 person
Haha Thank you!!!!!!
LikeLike